Sellers Most Asked Questions:
What is Mahalna?
Mahalna is Bahrain’s first online marketplace, aiming to make selling and buying a more easy and fun task. We connect sellers and buyers in our platform, allowing sellers to open virtual shops, list their products and accept orders directly from buyers.
How does selling on Mahalna work?
Selling on Mahalna is easy, open your shop and start listing your products free of charge. We don’t charge subscription or listing fees.
What products can I sell on Mahalna?
Mahalna allows the listing of multiple product categories such as fashion, beauty, electronics, household and office goods and many more. New categories are constantly evaluated and launched all the time. However, there are categories that we don’t allow listing:
- Weapons.
- Medicine and drugs.
- Alcohol.
- Fake and counterfeit products.
- Adult products.
- Tobacco products.
- Animals.
- Cars.
- Real estate.
- Offensive Products. (Mahalna reserves the right to determine the appropriateness of listings on its site, and remove any listing at any time.)
Reminder: all listings and products must comply with all laws and regulations.
What payment methods are used in Mahalna?
The only payment method accepted at the moment is Cash on Delivery.
Does Mahalna have a delivery service?
Yes. Mahalna is the entity doing the deliveries for the orders placed on the website.
How do I register as a seller?
– Click on the account icon, as demonstrated in the below screen.
![]()
– You will be presented with the registration form.
– Fill in all the fields, and choose the “I am a vendor” option. Like the below screen.
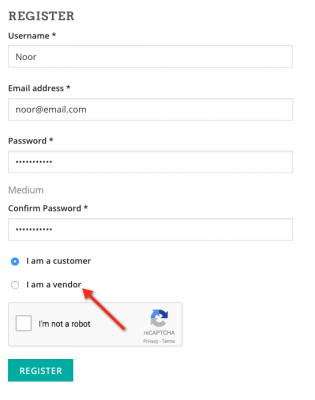
– Fill in the rest of the form with your details and your shop details.
– Click on “REGISTER”.
– You will receive an email to verify your account, if the email is not received in your inbox, please check your junk/spam folder and follow the instructions to verify and access your seller account.
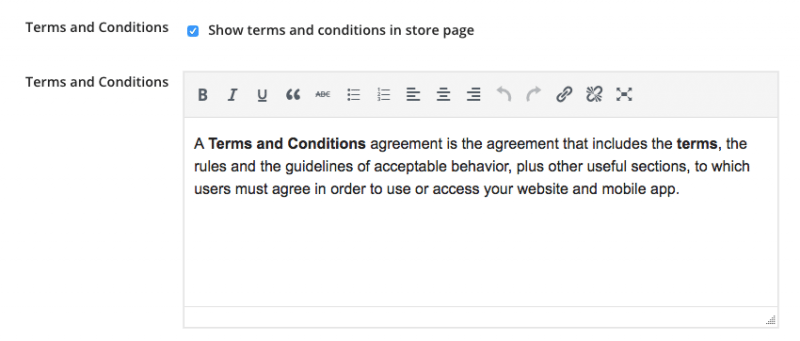
How do I enable Terms and Conditions for my store?
Please go to your Seller Dashboard > Store and there at the end of the form you will find a checkbox and a text input box for creating your terms and conditions page. After you are done writing, tick the checkbox and click update. You should now get your terms and conditions page tab added on your store front. It will appear as the image shown below.
Where do I set my Return and Shipping policy?
Please go to your Seller Dashboard > Shipping and there at the end of the form you will find text input box for creating your policies. After done writing, click Save Settings.
You should now find the policies under the Shipping tab on your product pages.
What is a Variable Product?
Variable product is a product type that lets you offer a set of variations of a product with control over prices, stock, image, and more for each variation. They can be used for a product like a T-Shirt where you can offer large t-shirt vs a small t-shirt.
How to create a Simple Product?
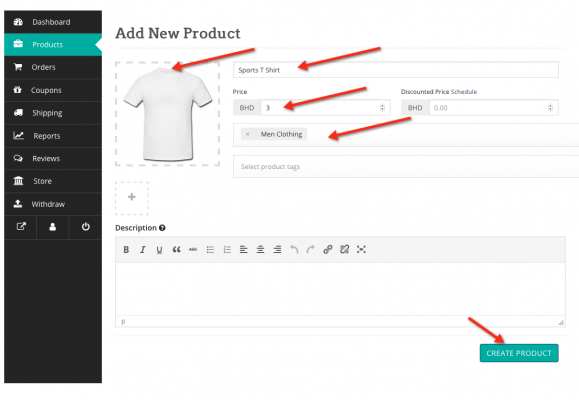
– Go to Seller Dashboard → Products → Add New Product.
– Fill in the mandatory fields such as Product Name, Category, Image and Price.
– Click on the image box to upload the Product Image.
– Click on “CREATE PRODUCT”.
– Fill in the optional fields if required.
– Click on “SAVE PRODUCT”.
How to create a Variable Product?
1) Create a product first:
Go to Seller Dashboard → Products → Add New Product
Fill in the mandatory fields, like product name, category, price and image. Upload the product image. It is advisable to upload additional images of the product into the gallery, like different angles, or front and back for example etc. Click on the CREATE PRODUCT Button.
In this example, we will create a set of T Shirts.
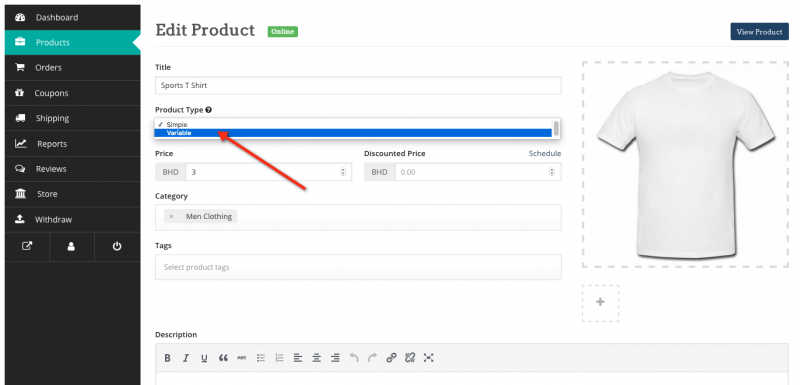
2) Once the product is created, you will be directed to the product edit page. Next, select Variable Product from the Product Type drop-down menu as seen in the screen below.
3) At this stage, create the attributes, which are the different types of your product (sizes, colors, etc).
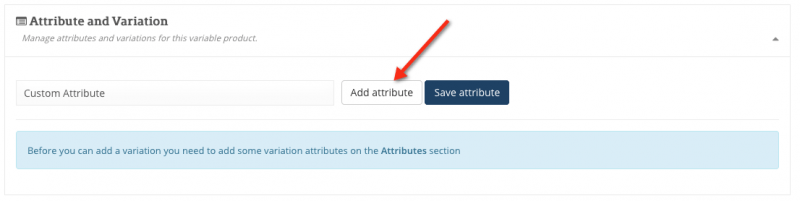
a) Scroll down to the “Attribute and Variation” section:
b) Click on the “Add attribute” button.
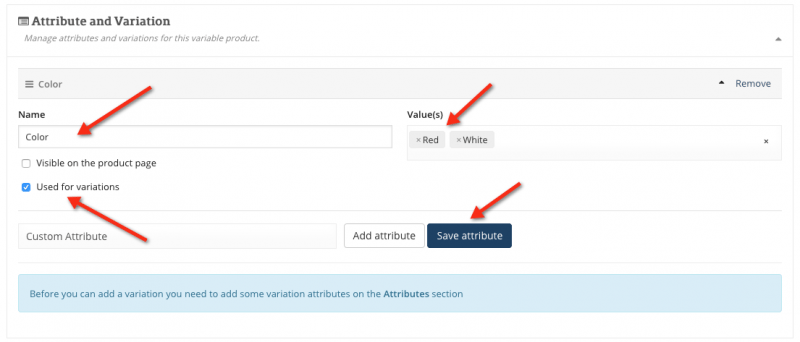
c) Provide the Attribute Name, and then their values. In this example, we are adding different colors. So the attribute name is “Color”, and the attributes are the Red and White. After each value hit Enter to take effect, or you can separate the values with the ” | ” symbol.
d) Check the “Used for variations” check box. This is a mandatory step.
e) Click on “Save attribute” as seen on the screen below.
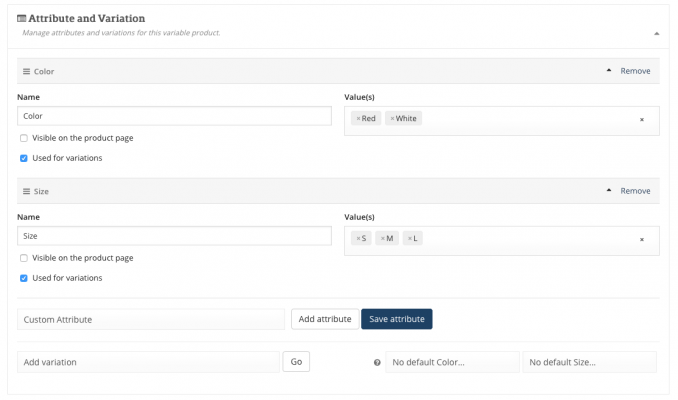
d) Repeat the above steps for any attributes you have for your products, in our example, we will create sizes (S,M and L). The Attribute section will look as seen in the below screen.
4) At this stage you would want to set the images, prices and availability of each product variation you have. So, to create the variations of your product from the values you provided earlier (colors and sizes):
a) On the same Attribute and Variation section, you will be presented with the “Add variation” option.
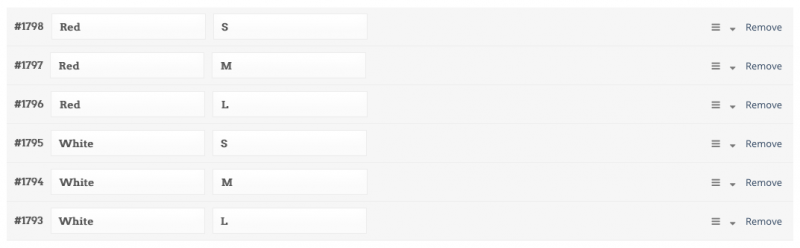
b) You can create a single variation according to your requirements by selecting the “Add variation” and then “Go”, or “Create variations from all attributes” to generate all possible variations from your attributes automatically. In this example we will create all possible attributes by selecting the second option, which will create 6 variations (Red S, Red M, Red L, White S, White M and White L)
c) Once the variations are created, it will look something like this.
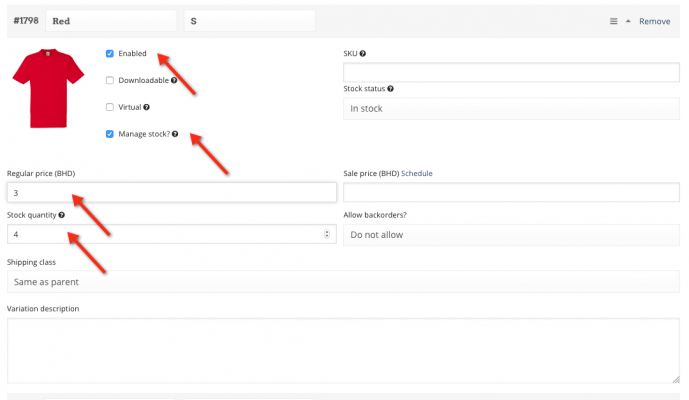
d) Expand each variation to configure it. Check the “Manage Stock” if you want to mange the stock (This will help you better control your products quantity). If you checked it, then set the “Stock Qty” to the number of products that you have for that variable.
e) Make sure the “Stock Status” is = In Stock.
f) Put the mandatory price of this product, and optionally you can set/schedule a discount.
g) Set the image for this variable by clicking on the image box. In our case it is a Red Small T-Shirt. It will look something like this:
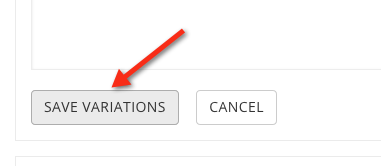
h) Repeat the previous step for each variation, and click on “SAVE VARIATIONS”.
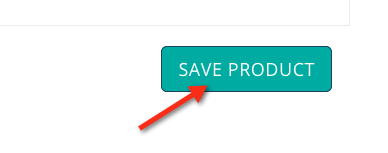
i) Click on “SAVE PRODUCT”.
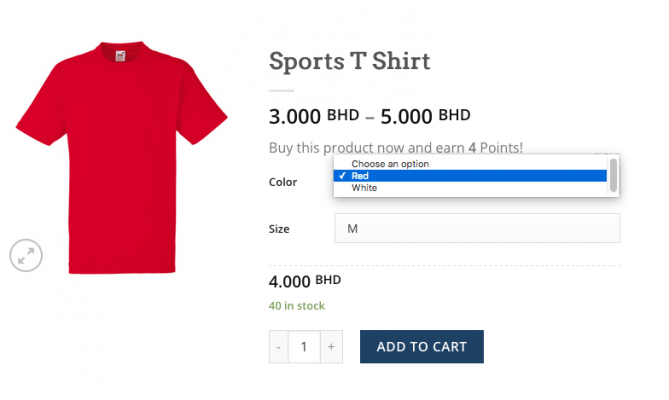
j) View your product to confirm your settings.
How do I accept orders?
– Under Seller Dashboard > Orders, you will see a list of all the customers’ orders.
– Click on the order to view all the details.
– Under the General Details box on the right side, you will see the Order Status, which is “Processing”.
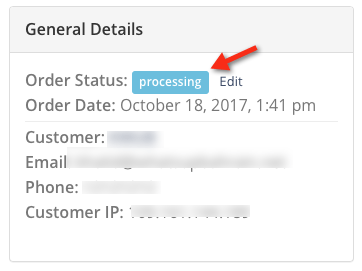
– At this stage, you prepare the product for shipment.
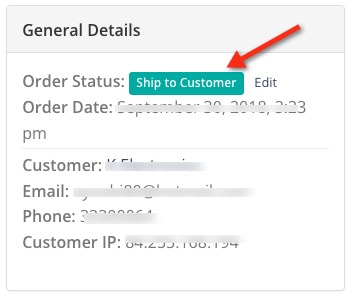
– Click on Edit, and change the status to “Ship to Customer” and then “Update”.
– A pop up window will ask you (the seller) to confirm the pickup address and phone number, please do so.
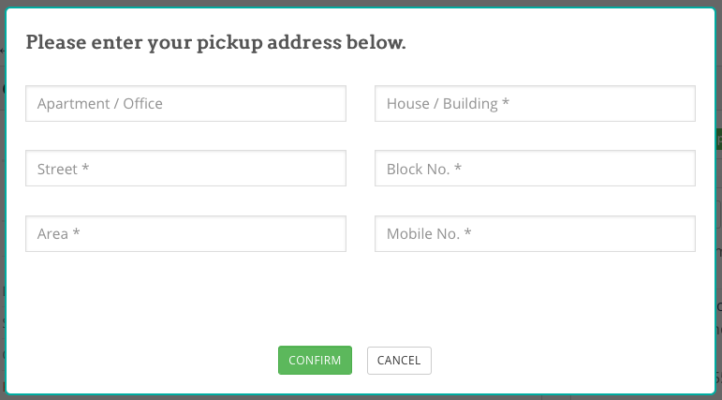
– In turn, Mahalna will send the delivery representative to pickup the product from the seller and deliver it to the customer.
– The customer will pay the amount in cash upon delivery.
– When the delivery and payment process are completed, the status of the order will automatically be changed to “Completed”.
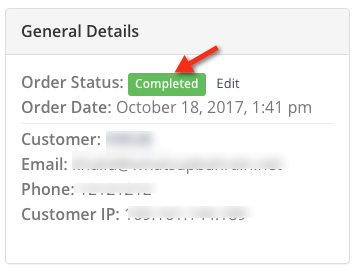
– The amount will then be available under your account on Mahalna under the Withdraw page. You can request the transfer of the amount to your own bank account. The transfer will take 3 business days.
How do I reject orders?
– Under Seller Dashboard > Orders, you will see a list of all the customers’ orders.
– Click on the order to view all the details.
– Under the General Details box on the right side, you will see the Order Status, which is “Processing”.
– If you have a reason to reject the order, change the order Status to “Canceled” and then “Update”.
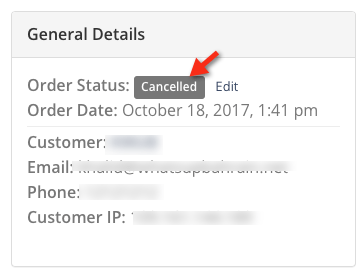
– At this point you requested to contact the customer and explain the reason behind the failure by adding a Note on the order page, or via email or phone.
How much commission does Mahalna take on each transaction?
Mahalna neither charges subscription nor listing fees. However, a commission is charged on purchases via Mahalna. To view a breakdown of the commission structure please refer to section 15.3 in the Terms and Conditions here.
How can I check my balance?
a) Login to your seller account.
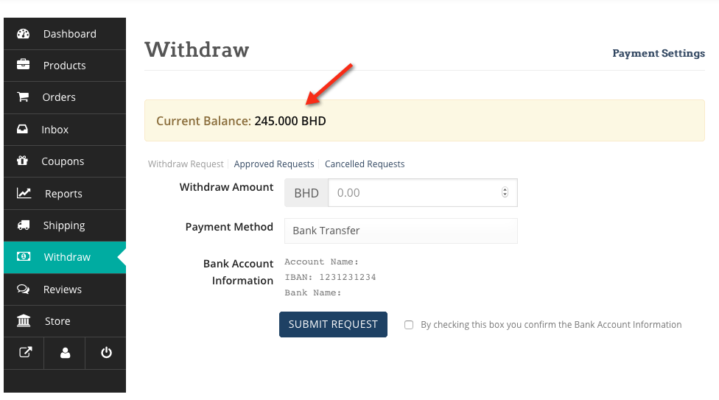
b) Navigate to Seller Dashboard → Withdraw.
You can see your current balance.
How can I contact the customer?
It is advised to contact the customer regarding his/her order whenever it is delayed, out of stock or it is out for delivery.
– Under Seller Dashboard > Orders, you will see a list of all the customers’ orders. Or just click here.
– Click on the order whose customer you want to contact.
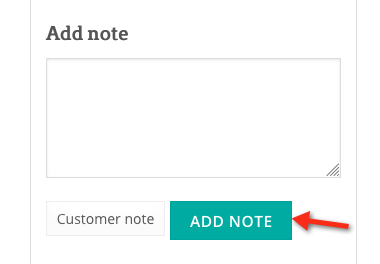
– At the bottom of the page, you can leave a note to the customer as in the image below. This will send an email notification to the seller.
How do I collect my money?
a) Login to your seller account.
b) Navigate to Seller Dashboard → Withdraw.
c) You can see your current balance.
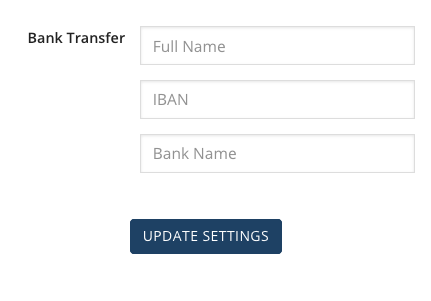
d) If you haven’t updated your Payment Settings yet, now is the time to do it. Click on the Payment Settings.
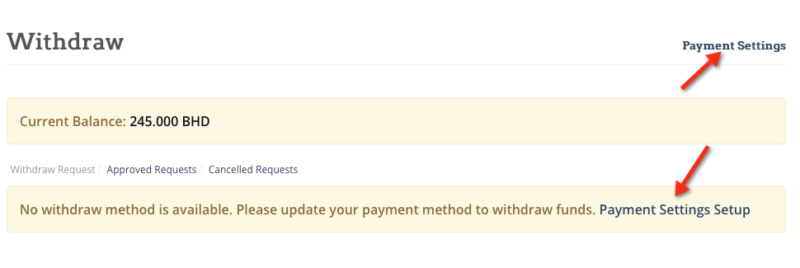
d) Fill in your bank details; your full name, IBAN and Bank Name, and then click on Update Settings.
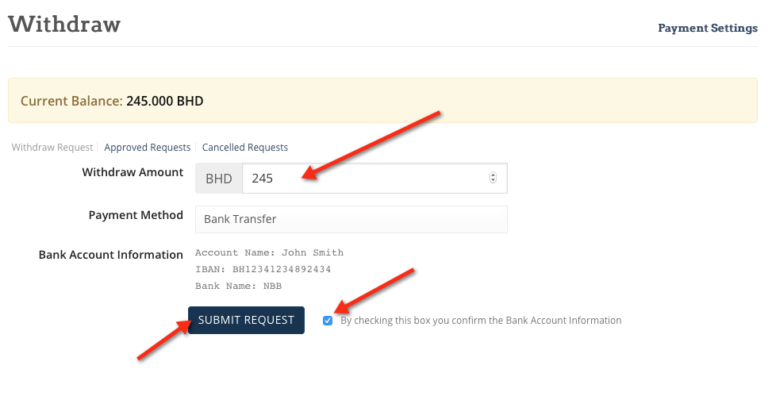
e) Navigate again to Seller Dashboard → Withdraw.
f) Make sure you are on the “Withdraw Request” tab.
g) A new box will appear where you can specify the amount you wish to withdraw. Fill the amount, check the box to confirm the bank details, then click on Submit Request.
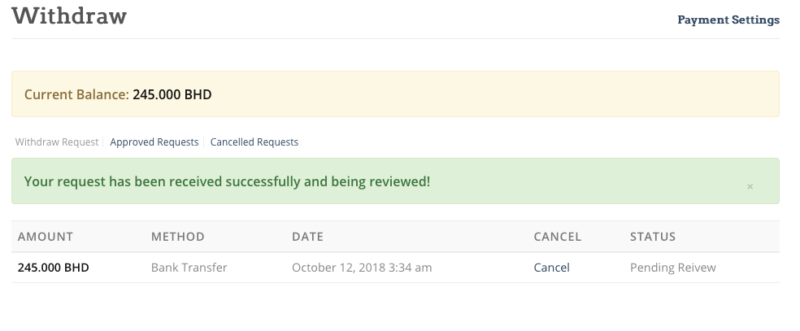
h) Mahalna will process the request and transfer the amount to your bank within 5 business days.
My product does not fall into any of Mahalna’s categories.
Kindly contact us and we will create the category for you.
How can I create a coupon to encourage buyers to come to my shop?
– Under Seller Dashboard > Coupons, click on “Add new Coupon”.
– Create the Coupon Title; this will be the code that you share with your customers.
– Chose the discount type. “Product Discount” is a fixed amount that will be discounted on checkout, whereas “Product % Discount” is a percentage discount.
– Configure the Amount.
– Under product, select the products you wish to include in this coupon.
– Click on “CREATE COUPON”.
– Share it with your customers who can use it during checkout.
I purchased a product but wish to return it. How can I do it?
Each seller has its own return policy. As a rule of thumb, it is the shopper’s duty to check the return policy of the seller before placing an order. If the shopper needs more clarity on a specific seller return policy then it is advised that the shopper should get in touch with seller via the portal-using the “Ask the Seller” function available under each product or by phone if necessary.
My customer wishes to return an item, how do I go by fulfilling his or her request?
As a seller, you are required to have a return and refund policy for your store. If you come across a situation where a customer submits a complaint regarding any of your a products, you are expected to act according to your shop’s and/or the specific product’s return policy.
Mahalna does not enforce any return policy on any of its sellers. However, Mahalna has a zero tolerance policy towards false advertisement of products and will enforce the penalties set out in the Terms and Conditions.
How do I set my shipping cost?
You don’t have to. Shipping is controlled by Mahalna.
What is the processing time and how can I set it?
Processing time is the time needed by you the seller to process and prepare the product and make it ready to be shipped. There are two ways to set the processing time.
1) Globally from the seller dashboard.
a) Login to your seller account.
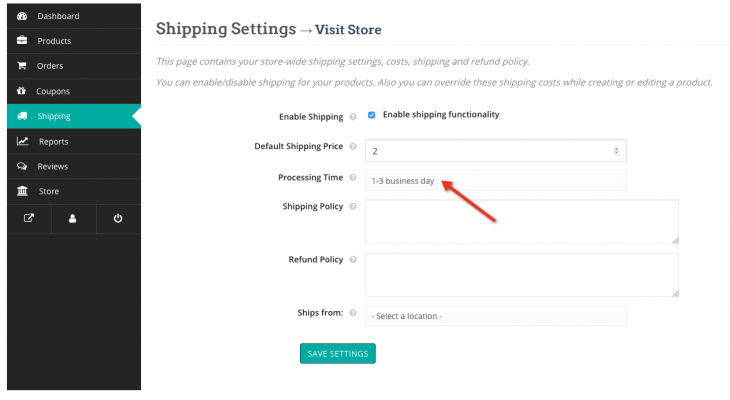
b) Navigate to Seller Dashboard → Shipping.
c) Fill in the Processing Time field as appropriate, like the below screen, and then click on “SAVE SETTINGS”:
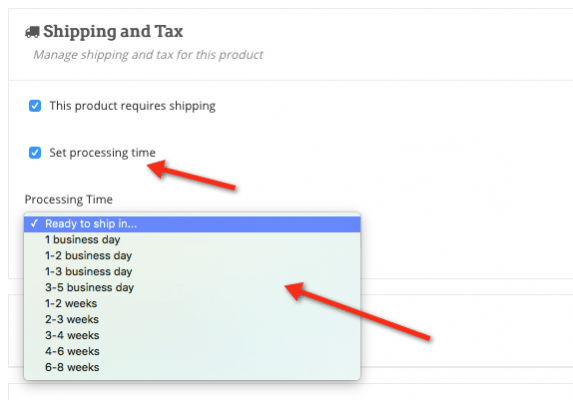
2) If you have one specific product that requires Processing Time that is different than what is configured globally, you can set it up on the product itself.
a) Login to your seller account.
b) Navigate to Seller Dashboard → Products.
c) Click on the desired product.
d) Scroll down to the Shipping Section.
e) Check the “Set Processing time” option.
f) Set the Processing Time, like the screen below, and then click on “SAVE PRODUCT”:
I wish to offer Discounts on some of my products. How can I do that?
You can either set a discounted price for your product permanently or you can schedule it. Or have a store-wide discount for you customers when they buy specific amount.
A) Permanently:
– Go to Seller Dashboard > Products.
– Edit your product.
– Enter the special price for the product in the dedicated box. Like the below screen.
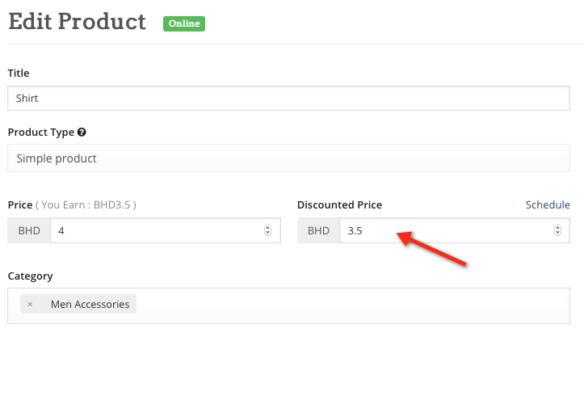
This will permanently set the special price, until you edit it again.
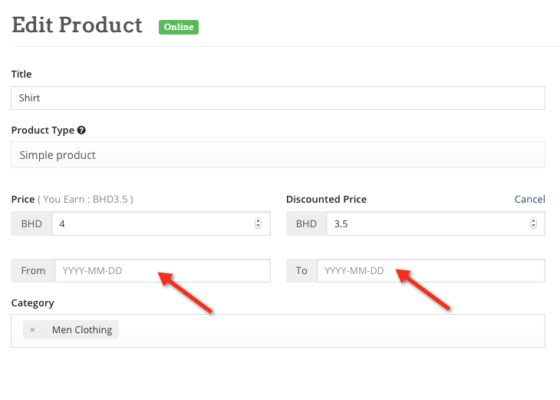
B) Scheduled:
– Go to Seller Dashboard > Products.
– Edit your product.
– Enter the special price for the product in the dedicated box. Like the below screen.
– Set the schedule. Like the below screen.
C) Store-Wide:
In this feature to set store wide discount for the customers, you can set minimum order amount upon which customers will get the specific discount. The customers must buy a minimum number of products within a single order to get this discount.
To activate bulk discount, navigate to Seller Dashboard→ Store Settings
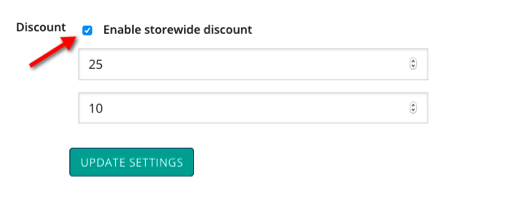
Now, enter the minimum amount that will give customers a percentage discount for any product.
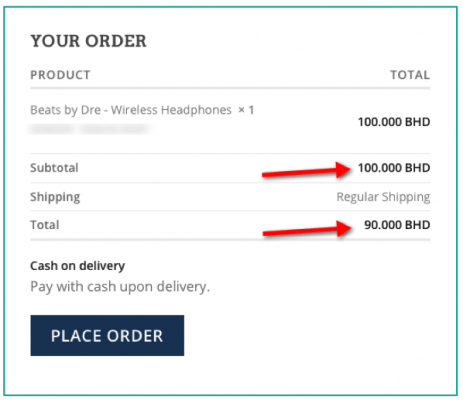
For this scenario, suppose a minimum order of 25 BD will give 10% discount on the total amount.
Therefore, adding a product that is equal or more than 25 BD amount to the cart will provide the following discount.
What countries does Mahalna operate in?
Mahalna is available in the Kingdom of Bahrain, with plans to launch soon in the GCC.
Can I sell internationally on Mahalna?
Not at this time.
How do I set a profile picture for my shop?
a) Login to your seller account.
b) Navigate to Seller Dashboard → Store.
You have the options to set upload a banner for your store, and a profile picture there.